"api工厂" 使用手册

api接口开箱即用,云后台管理,助力前端,解放后端开发;

不懂编程也能独立开发应用,小步快跑,快速创业!

旨为更懂你!

Stripe支付配置

开通支付


首先,你需要在 Stripe 官网开通你自己的支付账号信息:

https://stripe.com/


注册好以后,你即可获取 Stripe 的密钥信息:


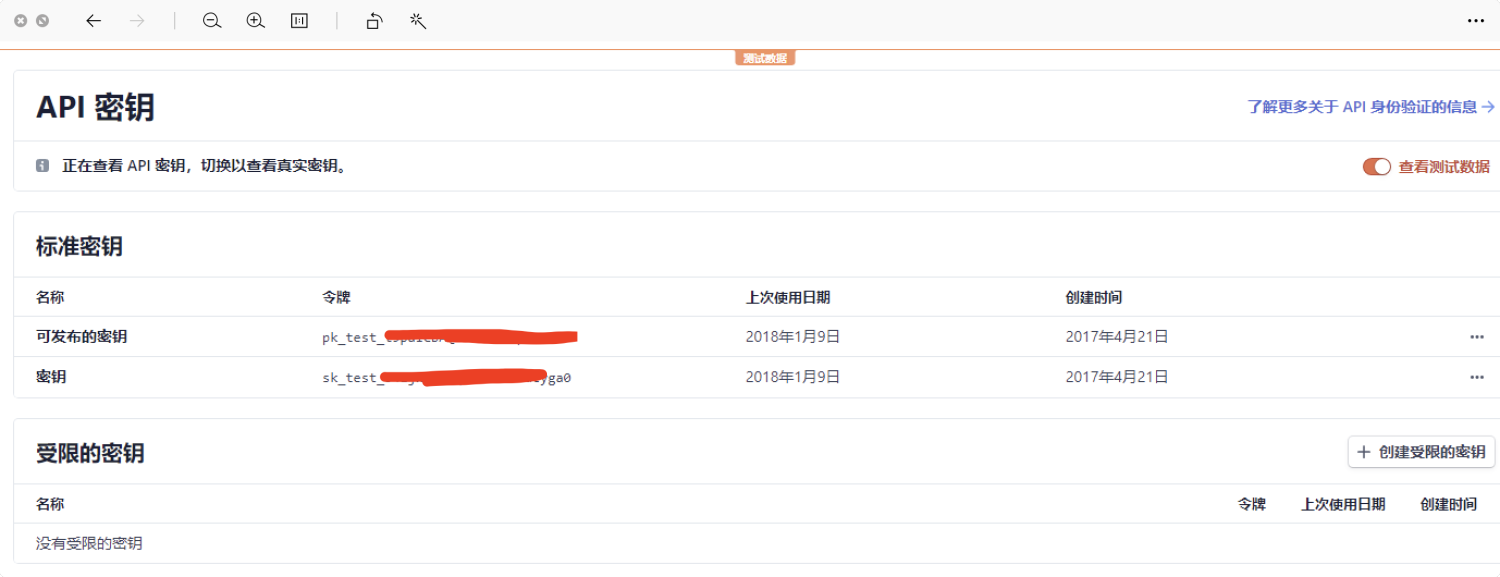
密钥主要包含两部分,可发布的密钥 + 密钥


同时,你需要找到你交易的对应的货币符号(currency) :

https://stripe.com/docs/currencies


比如:

  • 美元 USD
  • 人民币 JPY
  • 新加坡元 SGD

配置支付成功通知


stripe推荐用stripe自带的webhook监听整个付款的各个状态对应的URL回调地址。
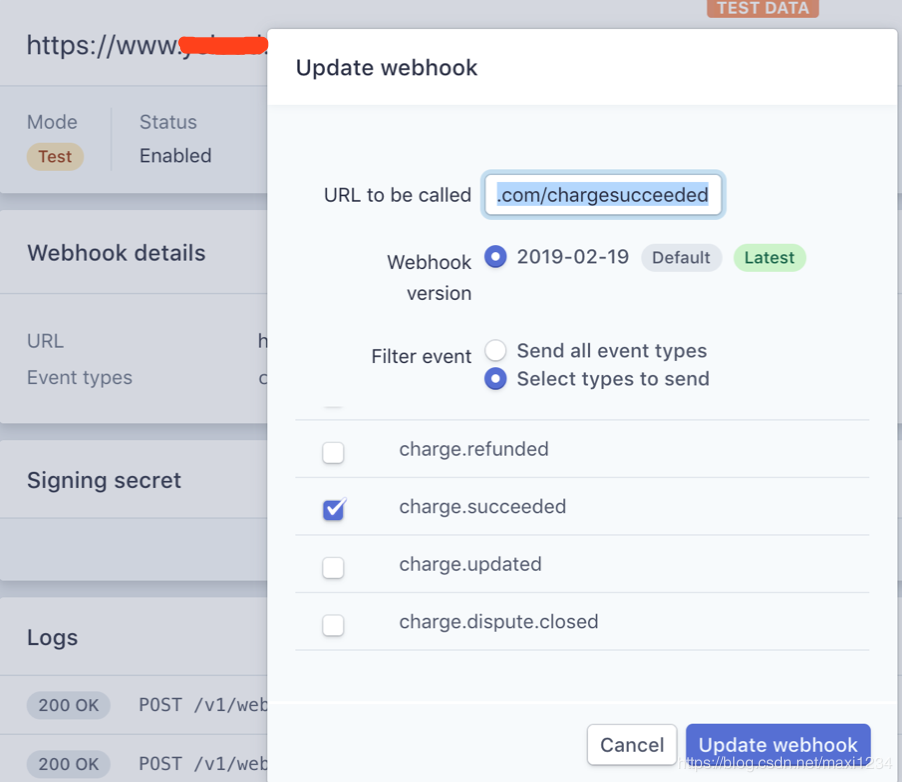


通知地址,请填写:


https://api.it120.cc/{domain}/pay/stripe/payBack


其中 {domain} 请更换为你自己的专属域名,比如您的专属域名是 abc,那么通知地址就是:

https://api.it120.cc/abc/pay/stripe/payBack


配置支付


开启在线支付模块


登陆 “api”工厂后台,左侧菜单,“工厂设置” --> “模块管理”,找到 “在线支付”模块,点击启用后,F5 刷新下网页即可在左侧菜单 “系统设置” 下看到 “在线支付”的菜单


点击 “在线支付”菜单,找到 “Stripe支付”标签,点击设置,填写上面步骤中的 可发布密钥、密钥、货币符号信息,即可完成配置。


H5支付地址


直接跳转到 stripe 的收银台就可以了,跳转收银台的参考代码如下:

<!doctype html>
<html>
<head>
  <meta charset="utf-8">
  <meta name="viewport" content="width=device-width, initial-scale=1">

  <title data-tid="elements_examples.meta.title">pay with stripe</title>
  <meta data-tid="elements_examples.meta.description" name="description" content="pay with stripe">

  <link rel="shortcut icon" href="stripe/img/favicon.ico">
  <link rel="apple-touch-icon-precomposed" href="stripe/img/apple-touch-icon/180x180.png">
  <link rel="icon" href="stripe/img/apple-touch-icon/180x180.png">  
  <script src="https://js.stripe.com/v3/"></script>
  <script>
    var stripe = Stripe('这里填你自己的stripe的publishableKey');
  </script>
  <script src="stripe/js/index.js" data-rel-js></script>

  <link href="https://fonts.googleapis.com/css?family=Roboto" rel="stylesheet">
  <link href="https://fonts.googleapis.com/css?family=Quicksand" rel="stylesheet">
  <link href="https://fonts.googleapis.com/css?family=Source+Code+Pro" rel="stylesheet">

  <link rel="stylesheet" type="text/css" href="stripe/css/base.css" data-rel-css="" />

  <!-- CSS for each example: -->
  <link rel="stylesheet" type="text/css" href="stripe/css/example1.css" data-rel-css="" />
  <script src="https://libs.baidu.com/jquery/2.1.4/jquery.min.js"></script>
  <script src="https://res.wx.qq.com/open/js/jweixin-1.3.2.js"></script>
</head>
<body>
  <div class="globalContent">
    <main>
    <div class="stripes">
      <div class="stripe s1"></div>
      <div class="stripe s2"></div>
      <div class="stripe s3"></div>
    </div>
    <section class="container-lg">      
      <!--Example 1-->
      <div class="cell example example1" id="example-1">
        <form>
          <!-- <fieldset>
            <div class="row">
              <label for="example1-name" data-tid="elements_examples.form.name_label">Name</label>
              <input id="example1-name" data-tid="elements_examples.form.name_placeholder" type="text" placeholder="Jane Doe" required="" autocomplete="name">
            </div>
            <div class="row">
              <label for="example1-email" data-tid="elements_examples.form.email_label">Email</label>
              <input id="example1-email" data-tid="elements_examples.form.email_placeholder" type="email" placeholder="janedoe@gmail.com" required="" autocomplete="email">
            </div>
            <div class="row">
              <label for="example1-phone" data-tid="elements_examples.form.phone_label">Phone</label>
              <input id="example1-phone" data-tid="elements_examples.form.phone_placeholder" type="tel" placeholder="(941) 555-0123" required="" autocomplete="tel">
            </div>
          </fieldset> -->
          <fieldset>
            <div class="row">
              <div id="example1-card"></div>
            </div>
          </fieldset>
          <button type="submit" data-tid="elements_examples.form.pay_button">Pay</button>
          <div class="error" role="alert"><svg xmlns="http://www.w3.org/2000/svg" width="17" height="17" viewBox="0 0 17 17">
              <path class="base" fill="#000" d="M8.5,17 C3.80557963,17 0,13.1944204 0,8.5 C0,3.80557963 3.80557963,0 8.5,0 C13.1944204,0 17,3.80557963 17,8.5 C17,13.1944204 13.1944204,17 8.5,17 Z"></path>
              <path class="glyph" fill="#FFF" d="M8.5,7.29791847 L6.12604076,4.92395924 C5.79409512,4.59201359 5.25590488,4.59201359 4.92395924,4.92395924 C4.59201359,5.25590488 4.59201359,5.79409512 4.92395924,6.12604076 L7.29791847,8.5 L4.92395924,10.8739592 C4.59201359,11.2059049 4.59201359,11.7440951 4.92395924,12.0760408 C5.25590488,12.4079864 5.79409512,12.4079864 6.12604076,12.0760408 L8.5,9.70208153 L10.8739592,12.0760408 C11.2059049,12.4079864 11.7440951,12.4079864 12.0760408,12.0760408 C12.4079864,11.7440951 12.4079864,11.2059049 12.0760408,10.8739592 L9.70208153,8.5 L12.0760408,6.12604076 C12.4079864,5.79409512 12.4079864,5.25590488 12.0760408,4.92395924 C11.7440951,4.59201359 11.2059049,4.59201359 10.8739592,4.92395924 L8.5,7.29791847 L8.5,7.29791847 Z"></path>
            </svg>
            <span class="message"></span></div>
        </form>
        <div class="success">
          <div class="icon">
            <svg width="84px" height="84px" viewBox="0 0 84 84" version="1.1" xmlns="http://www.w3.org/2000/svg" xmlns:xlink="http://www.w3.org/1999/xlink">
              <circle class="border" cx="42" cy="42" r="40" stroke-linecap="round" stroke-width="4" stroke="#000" fill="none"></circle>
              <path class="checkmark" stroke-linecap="round" stroke-linejoin="round" d="M23.375 42.5488281 36.8840688 56.0578969 64.891932 28.0500338" stroke-width="4" stroke="#000" fill="none"></path>
            </svg>
          </div>
          <h3 class="title" data-tid="elements_examples.success.title">Payment successful</h3>
          <button type="button" onclick="backwx()">完成</button>
        </div>
      </div>
    </section>
    </main>
  </div>

  <!-- Simple localization script for Stripe's examples page. -->
  <script src="/assets/stripe/js/l10n.js" data-rel-js></script>

  <!-- Scripts for each example: -->
  <script src="/assets/stripe/js/example1.js" data-rel-js></script>
  <script>
    function tokenCallBack2222222(example, error, errorMessage, token) {
      // example.classList.add('submitted');
      errorMessage.innerText = 'sasasasasas';
      error.classList.add('visible');
    }
    function tokenCallBack(example, error, errorMessage, token) {
      $.post("https://api.it120.cc/你自己的专属域名/pay/stripe/pay", {
        money: '金额',
        nextAction: '',
        token: '用户登录token',
        stripeToken: 'stripeToken',
      }, function (result) {
        console.log(result);
        if (result.code == 0) {
          example.classList.add('submitted');
        } else {
          errorMessage.innerText = result.msg;
          error.classList.add('visible');
        }
      });
    }
    function backwx() {
      wx.miniProgram.reLaunch({url: "/pages/index/index?type=stripe"});
    }
  </script>
</body>
</html>

📎stripe.zip

stripeToken 如何获取


https://stripe.com/docs/stripe-js/react

https://stripe.com/docs/libraries/stripejs-esmodule#web-stripejs-html

详情看上面的官方教程,在 h5 页面上构建表单,通过

stripe.createToken(elements[0], additionalData).then(function(result) {
      // Stop loading!
      example.classList.remove('submitting');

      if (result.token) {
        // 这个方法回调的就是 stripeToken
        // If we received a token, show the token ID.
        // example.querySelector('.token').innerText = result.token.id;
        // example.classList.add('submitted');
      } else {
        // Otherwise, un-disable inputs.
        enableInputs();
      }
    });


测试支付


Stripe 同时提供了测试的密钥和正式的密钥,测试的时候,请在“api工厂”填写测试的密钥信息

测试环境下,您可以使用这些测试信用卡号来完成支付:

https://stripe.com/docs/testing

Copyright © 杭州于芯科技有限公司

浙ICP备15041833号